- Part 1: Recover Lost Data Directly from iPhone 4S
In this mode, you can directly scan your iPhone 4S to retrieve data lost because of accidental deletion.
Step 1. Connect your iPhone 4S with your computer
Connect your iPhone 4S with your computer with data cable, and then launch Wondershare Dr.Fone (iPhone 4S). You’ll see an interface as below.
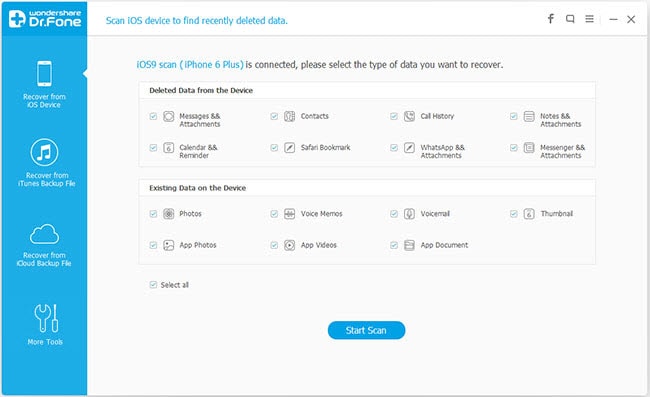
Step 2. Select “Recover from iOS Device” mode
Here your device name will be displayed. Click “Start” and then Dr.Fone will analyze your iPhone 4S.
The analyzing time depends on the data amount inside your device. You just need to wait for the end of device analysis.
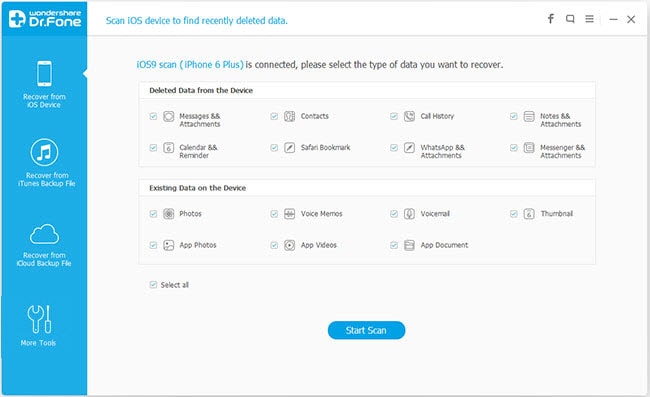
Step 3. Scanning data of your iPhone 4S
When the analysis completes, Dr.Fone will automatically scan your iPhone 4S.
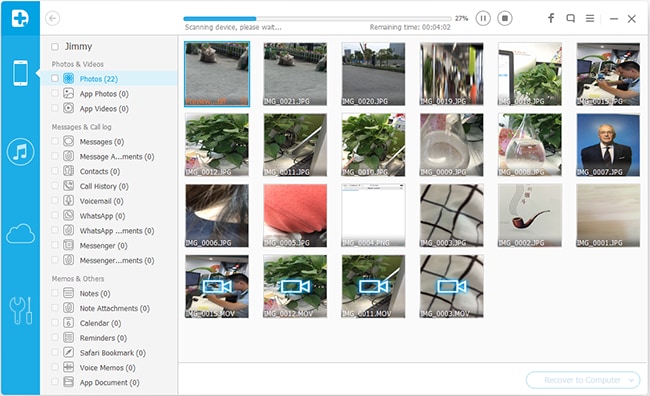
Step 4. Preview found data and recover files selectively
After the scan, all found contents in your iPhone 4S will be listed in categories, including “Contacts”, “Messages”, “Notes”, “Call History”, “Safari Bookmarks”, “Reminders”, etc.
You can preview all of them one by one so as to check whether they are what you want to retrieve or not.
Then you just need to select files you need and click “Recover” to save them on your computer.
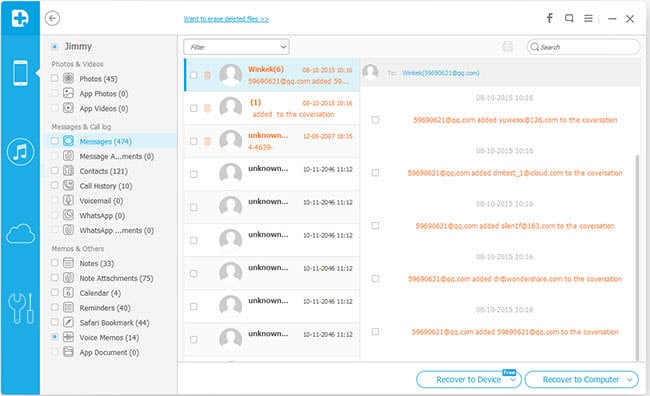
Note: Wondershare Dr.Fone (iPhone 4S) currently does not support directly recovery of “Camera Roll”, “Photo Stream”, “Photo Library”, “Message Attachments” and “Voice Memos”. Plus, all existed files will be detected and displayed. You can click “Only display the deleted items” to hide the existed data.
Part 2: Recover Previous Data from iTunes Backup
This recovery mode allows you to recover your previous data by extracting iTunes backup. You can use this recover mode to find your previous data that you failed to directly recover from your device, or you lost your device.
Step 1. Select iTunes backup file to scan
When launching the program, you’ll be lead to the "Recover from iOS Device" mode (the default mode). Switch to “Recover from iTunes Backup File”.

Here, all your iTunes backup files of your iPhone, iPad or iPod touch which has ever synced with iTunes on this computer will be automatically found and listed. Select the one of yours and click "Start Scan" to begin iTunes backup extracting.
Step 2. Preview and recover previous data
After the scan, all your data backed up by iTunes can be found and displayed in categories. You can preview them one by one before recovery.
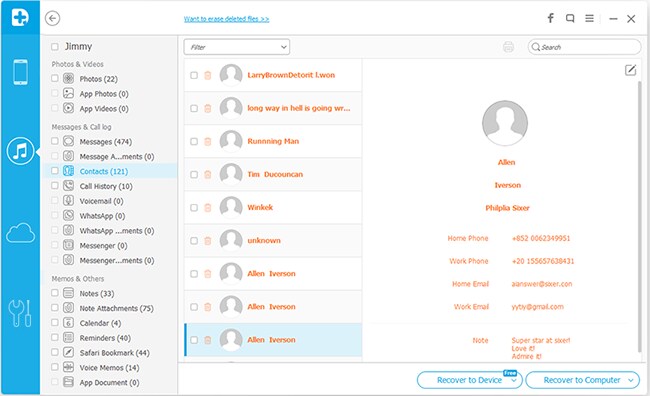
- Then you can selectively mark and recover those you want by pressing "Recover" button at the bottom.
Note: Don't sync your device with iTunes when you realize that you've lost data, or the iTunes backup file will be updated after the sync, if you want to recover them through this recovery mode.
- Then you can selectively mark and recover those you want by pressing "Recover" button at the bottom.
-


Search This Blog Post
How to recover lost data for iPhone 4S after upgrade to ios6
Subscribe to:
Post Comments (Atom)

No comments:
Post a Comment